
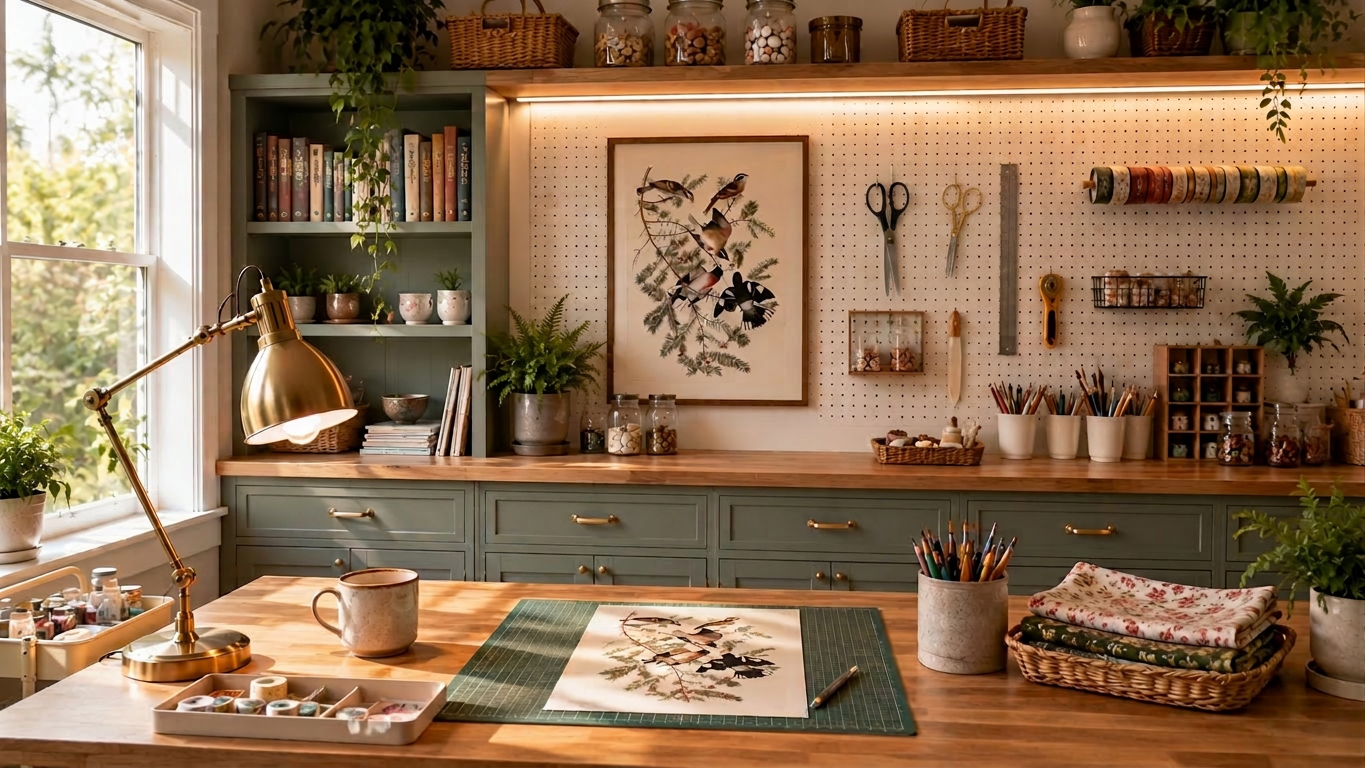
Whether you enjoy sewing, painting, scrapbooking, paper crafts, or a little bit of everything, proper craft room storage and organization makes every project easier to enjoy. The goal isn’t to fill the room with more supplies. It’s to create a space that’s organized, comfortable, and ready whenever inspiration strikes.
The most inviting craft rooms have a few things in common. They make good use of storage, offer plenty of workspace, and feel bright without being cluttered. They also reflect the personality of the person using them.
These craft room ideas combine practical organization with thoughtful design so your space works as beautifully as it looks.
The Designer’s Blueprint for a Beautiful Craft Room
If you look through enough professionally designed craft rooms, you’ll start to notice the same design principles again and again.
Most successful spaces include:
- One large anchor piece for storage
- A spacious work surface
- A mix of open and closed storage
- Good lighting for both everyday tasks and detailed projects
- A few personal touches that make the room feel inviting
You don’t need everything at once. Start with the pieces that will have the biggest impact, then build your room over time.
1. Start With One Beautiful Anchor Piece

Every craft room needs one feature that keeps the space organized. In most rooms, that’s a storage cabinet, built-in shelving, or a large bookcase.
Instead of adding small storage solutions wherever they’ll fit, begin with one piece that can hold the majority of your supplies. It immediately gives the room structure and creates a designated home for everything from fabric and yarn to paint, ribbon, and cutting tools.
If you’re working with a smaller room, choose a tall cabinet or shelving unit that makes use of vertical space. If you prefer a cleaner look, cabinets with doors hide visual clutter while still keeping supplies close by. Open shelving works well for attractive items like baskets, jars, books, and neatly folded fabric.
Designer Secret
Before buying additional storage, see how much one quality cabinet can hold. One larger piece usually looks cleaner than several smaller organizers scattered around the room.
Shop This Look
- Tall craft storage cabinet
- Glass-door cabinet
- Cube storage system
- Floating wood shelves
- Woven storage baskets
2. Create a Workspace You’ll Actually Want to Use

Your work surface is the heart of the room. It should be large enough for your favorite projects and durable enough to handle daily use.
If you quilt or sew, you’ll appreciate extra room for cutting fabric and laying out patterns. If you scrapbook or make cards, you’ll want enough space to spread out paper, tools, and embellishments without feeling cramped.
Choose the largest table your room can comfortably accommodate. A surface that’s too small quickly becomes frustrating, especially if you’re constantly moving supplies to make room for the next step.
Storage built into the table is another bonus. Drawers and open shelves keep your most-used tools nearby without taking over your workspace.
Designer Secret
Leave one small project out whenever possible. Seeing an unfinished project ready to go makes it much easier to pick it back up instead of putting it off until another day.
Shop This Look
- Large craft table
- Height-adjustable craft table
- Folding craft table
- Ergonomic craft chair
- Self-healing cutting mat
3. Turn Everyday Supplies Into Part of the Décor

Not everything needs to be tucked away behind cabinet doors. Some of the prettiest craft rooms display everyday supplies as part of the design.
Transfer buttons, ribbon, paintbrushes, colored pencils, and markers into matching containers. Fold fabric neatly by color, organize yarn in baskets, and keep frequently used tools in ceramic crocks or glass jars on open shelves.
The goal isn’t to display everything. Instead, choose the supplies you use most often or those that naturally add color and texture to the room. Store the rest inside cabinets or drawers.
Using matching containers throughout the room also creates a more polished look. Even inexpensive storage feels intentional when the materials and colors are repeated.
Designer Secret
Choose two or three storage materials and repeat them throughout the room. For example, woven baskets, clear glass jars, and white storage bins create a consistent look that’s easy to maintain.
Shop This Look
- Glass storage jars
- Acrylic storage containers
- Woven baskets
- Ceramic utensil holders
- Wooden display trays
4. Choose a Color Palette That Lets Your Projects Shine

One of the easiest ways to make a craft room feel professionally designed is to limit the color palette. Many of the most beautiful creative spaces use simple backgrounds so the projects themselves become the focal point.
Start with a neutral base, such as white, cream, soft gray, or warm beige. Then add one accent color that appears throughout the room. Sage green, dusty blue, muted terracotta, and soft mustard all work well because they add personality without overwhelming the space.
Natural materials also help tie everything together. Wood shelves, woven baskets, linen storage bins, and ceramic containers add warmth while keeping the room feeling calm.
If you love color, let your supplies provide it. Paint bottles, fabric stacks, scrapbook paper, and yarn collections naturally become part of the décor when the room itself has a simpler backdrop.
Designer Secret
Try limiting your room to one neutral, one wood tone, and one accent color. Repeating those colors throughout the space creates a cohesive look without feeling overly decorated.
Shop This Look
- Neutral area rug
- Sage green desk accessories
- Wooden floating shelves
- Ceramic storage containers
- Linen storage bins
5. Add a Rolling Cart for Your Current Project

A rolling cart is one of the hardest-working pieces in a craft room. Instead of spreading supplies across your table or carrying them from room to room, you can keep everything for your current project together in one place.
It’s especially useful if your craft room doubles as a home office or guest room. When you’re finished for the day, simply roll the cart into a corner until you’re ready to continue.
Many crafters even dedicate a cart to a specific hobby. One might hold sewing supplies, while another stores Cricut tools, watercolor paints, or wrapping essentials.
Designer Secret
Use the top shelf for the supplies you reach for most often, the middle shelf for works in progress, and the bottom shelf for backups or bulk materials. Keeping the heaviest items on the bottom also makes the cart easier to move.
Shop This Look
- Three-tier rolling utility cart
- Rolling craft cart with drawers
- Cricut storage cart
- Small storage bins
- Label clips
6. Create Activity Zones Instead of One Catch-All Space

A well-organized craft room isn’t just about storage. It’s about creating a workflow that makes sense.
Rather than storing everything together, group supplies by the type of project you use them for. Keep sewing tools together, organize paints and brushes in another area, and dedicate a shelf or drawer to paper crafts, gift wrapping, or Cricut supplies.
This approach makes it easier to find what you need and simplifies cleanup because every item has a logical home.
You don’t need a large room to create zones, either. Even one cabinet can be divided into sections using baskets, bins, or labeled drawers.
Designer Secret
Organize your room based on how you naturally work, not by how supplies are sold in the store. If you always use ribbon with gift wrapping, store them together instead of keeping all ribbon in one place.
Shop This Look
- Drawer organizers
- Stackable storage bins
- Shelf dividers
- Label maker
- Clear storage containers
7. Layer Your Lighting

Good lighting can completely change the way a craft room looks and functions. It helps reduce eye strain, makes colors appear more accurate, and allows you to work comfortably on detailed projects.
The best craft rooms use more than one light source. Start with bright overhead lighting, then add a task lamp where you do most of your work. If your room has windows, position your work table nearby to take advantage of natural daylight.
Accent lighting can also make the room feel warmer and more inviting. A small table lamp on a bookshelf or cabinet adds ambiance without replacing the brighter lighting you need for crafting.
Designer Secret
If you photograph your projects for Pinterest, Etsy, or social media, place your main work surface next to a window whenever possible. Natural light produces more accurate colors and softer shadows than most indoor lighting.
Shop This Look
- Adjustable LED task lamp
- Full-spectrum daylight bulb
- Under-cabinet lighting
- Decorative table lamp
- Pendant light fixture
8. Mix Open and Closed Storage Like a Designer

One of the easiest ways to make a craft room feel polished is to balance what you display with what you hide.
Closed cabinets are perfect for extra supplies, tools, and anything that creates visual clutter. Open shelves, on the other hand, are ideal for items that add texture and color, like neatly folded fabric, yarn, books, baskets, or glass jars filled with buttons.
The contrast between open and closed storage keeps the room feeling organized without looking sterile. It also gives your eye places to rest, making the entire space feel calmer.
When styling open shelves, resist the urge to fill every inch. Leave a little breathing room between groups of objects. The empty space is just as important as the items you display.
Designer Secret
Aim for roughly 70% closed storage and 30% open display. It’s not a strict rule, but it’s a helpful guideline for creating a room that feels organized without looking crowded.
Shop This Look
- Storage cabinet with doors
- Open bookcase
- Floating wood shelves
- Decorative woven baskets
- Glass storage jars
9. Keep Your Favorite Supplies Within Reach

Think about the tools you use during almost every project. Your favorite scissors, ruler, adhesive, paintbrushes, rotary cutter, or measuring tape shouldn’t be buried in the back of a cabinet.
Store everyday essentials where you can grab them without thinking. A desktop organizer, pegboard, magnetic strip, or decorative crock can keep frequently used tools visible without making the room feel cluttered.
Less frequently used supplies can stay in drawers or cabinets until you need them.
The easier it is to reach your tools, the easier it is to start creating.
Designer Secret
Interior designers often organize shelves by frequency of use. Keep everyday supplies between waist and shoulder height, and reserve higher shelves for seasonal items or materials you only use occasionally.
Shop This Look
- Pegboard organization system
- Desktop organizer
- Magnetic tool strip
- Decorative ceramic crocks
- Rotating supply organizer
10. Add Personal Touches That Make the Room Feel Like Yours

Once the main furniture is in place, it’s time to make the room feel finished. A few carefully chosen decorative touches can make a craft room more enjoyable to spend time in without creating extra clutter.
Hang artwork that inspires you, display a few favorite handmade projects, or add a bulletin board for sketches, color palettes, and ideas. A plant, a patterned rug, or a table lamp can also make the room feel warmer and more inviting.
The key is to decorate with intention. Every item should either make the room more functional or make you happy to be there.
Designer Secret
Decorate in small groups instead of spreading items evenly throughout the room. A stack of books, a small plant, and a ceramic container filled with paintbrushes creates a stronger focal point than placing those items separately around the room.
Shop This Look
- Framed artwork
- Bulletin board
- Faux or live plant
- Patterned area rug
- Decorative table lamp
11. Make Every Square Foot Work Harder

A dedicated craft room is nice to have, but it’s far from necessary. Some of the most functional creative spaces are tucked into guest rooms, home offices, laundry rooms, walk-in closets, or even an unused corner of a bedroom.
Look for furniture that serves more than one purpose. Fold-away tables, storage cabinets with built-in work surfaces, and wall-mounted shelves help maximize limited space.
Vertical storage is especially valuable in smaller rooms. Installing shelves above your desk or adding a pegboard keeps supplies off your work surface while making them easy to reach.
Designer Secret
Before buying new furniture, measure your room and mark the footprint on the floor with painter’s tape. It’s an easy way to see how much space a cabinet or table will actually take up before it arrives.
Shop This Look
- Fold-away craft table
- Wall-mounted shelving
- Pegboard organization system
- Storage cabinet
- Slim rolling cart
12. Build a Room You’ll Want to Use Again Tomorrow

The best craft rooms aren’t the ones with the most storage or the biggest budgets. They’re the ones that make it easy to sit down and start creating.
That usually comes down to a few simple things. Your supplies are organized, your workspace stays clear, and everything you use most often is within easy reach.
Don’t worry about creating the perfect room all at once. Start with the basics, use the space for a while, and make changes as you learn what works best for you. Your craft room should evolve along with your hobbies.
Designer Secret
Leave a few empty shelves, drawers, or baskets when you’re organizing. Creative hobbies have a way of growing over time, and having room to expand will save you from reorganizing everything a few months later.
Build It One Piece at a Time
Creating a beautiful craft room doesn’t have to happen in one weekend. In fact, the best spaces usually come together over time.
Start with a comfortable work surface and one dependable storage piece. Once those are in place, add lighting that makes detailed work easier, then organize your supplies in a way that fits how you naturally create.
As your collection grows, layer in shelves, baskets, artwork, and decorative details that make the room feel personal. Small improvements add up, and each one makes the space a little more enjoyable to use.
The goal isn’t to copy someone else’s craft room. It’s to create one that fits your home, your hobbies, and the way you like to work.
Final Thoughts
A beautiful craft room isn’t defined by expensive furniture or perfectly styled shelves. It’s a space that helps you stay organized, supports your creativity, and makes you want to come back for your next project.
Whether you have an entire room to dedicate to crafting or just a small corner of your home, thoughtful design can make every project more enjoyable. Focus on the pieces that matter most, build your space one step at a time, and create a room that’s as functional as it is beautiful.