
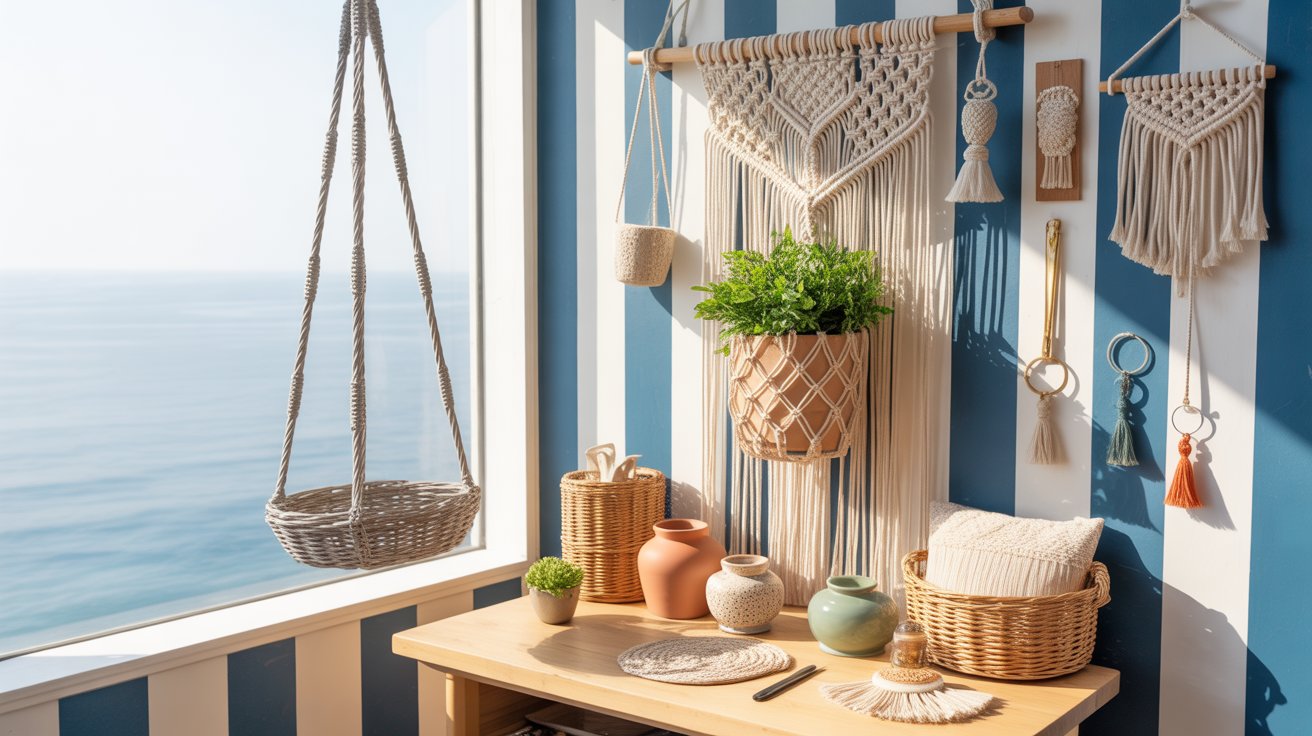
Macramé is one of the easiest crafts to learn because you only need a few basic supplies and a handful of simple knots to create something beautiful. Whether you’re decorating a small apartment, a dorm room, or a cozy corner of your home, these beginner-friendly projects add texture, warmth, and personality without taking up much space.
Even if you’ve never tried macramé before, don’t let the knots intimidate you. Most of these projects use the same basic techniques over and over, so you’ll build confidence with each one.

Materials You’ll Need (Master Shopping List)
- Cotton cord or macramé rope (1–3 mm for small projects, thicker for plant hangers)
- Small wooden dowels or rings (for wall hangings, coasters, or jewelry holders)
- 3. Key rings (for macramé keychains)
- Small plant pots (for hangers and wall planters)
- Scissors
- Tape measure or ruler
- Beads or charms (optional, for keychains or tassels)
- Metal or wooden rings (optional, for tiebacks or coasters)
- Wall hooks or nails for hanging projects
Before You Start
If you’re completely new to macramé, here are a few things to know before you begin.
- Single-strand cotton cord is the easiest to work with and creates the soft fringe seen in many macramé projects.
- Start with 2–3 mm cord for smaller projects and 3–5 mm for larger home décor.
- Don’t worry if your first few knots aren’t perfect. Consistent tension is more important than speed.
- Sharp scissors and a measuring tape will make every project easier.
Basic knots you’ll use throughout this article:
- Lark’s Head Knot
- Square Knot
- Half Hitch Knot
- Spiral Knot
If you’re brand new to macramé, consider practicing these four knots before starting your first project.
10 DIY Macramé Projects for Small Spaces
These 10 macramé projects add texture, style, and personality to small spaces. Each project is simple to make. They work for apartments, tiny homes, or as handmade gifts.

Mini Macramé Wall Hanging
A mini wall hanging is one of the easiest ways to learn macramé because it introduces basic knots without requiring a large project. It’s perfect for filling a small blank wall, decorating a bookshelf, or adding handmade texture to a gallery wall.
Difficulty: Beginner
Time: 30–45 minutes
Materials
- 2–3 mm single-strand cotton cord
- Wooden dowel or natural branch (6–12 inches)
- Sharp scissors
- Measuring tape
- Optional wooden beads
Step-by-Step
1. Cut your cord.
Cut four to six pieces of cord, making each piece about twice as long as the finished wall hanging you want to create.
2. Attach the cords.
Fold each cord in half and attach it to the dowel using a lark’s head knot. Slide the knots together so the cords are evenly spaced across the dowel.
3. Tie your design.
Working from the top down, create a simple pattern using square knots. If you’re comfortable with basic macramé, you can add a few rows of half hitch knots for extra texture, but repeating one knot throughout creates a beautiful design that’s perfect for beginners.
4. Shape the fringe.
Once all the knots are complete, trim the loose ends into a straight edge, soft curve, or gentle V-shape. If you’re using single-strand cord, you can brush the fringe with a fine-tooth comb for a fuller, softer look.
5. Hang your finished piece.
Display your wall hanging on a small hook or nail and make any final adjustments so the cords hang evenly.
Beginner Tips
- Keep your first design simple. Repeating one knot pattern often looks more polished than trying several different knots.
- Step back every few rows to make sure both sides look balanced.
Common Mistakes to Avoid
- Pulling some knots tighter than others can make the finished piece lean to one side.
- Wait until all of your knotting is finished before trimming the fringe.
Pro Tip
Natural cotton cord creates a timeless look, but adding one or two wooden beads can personalize your wall hanging without making it feel busy.

Macramé Plant Hanger
A handmade plant hanger is both decorative and practical. It frees up shelf space, adds greenery at eye level, and introduces you to one of the most useful macramé techniques: creating a simple net to support a flower pot.
Difficulty: Beginner
Time: 45–60 minutes
Materials
- 3–4 mm single-strand cotton cord
- Wooden or metal ring
- Lightweight plant pot
- Sharp scissors
- Measuring tape
Step-by-Step
1. Cut the cord.
Cut four equal lengths of cord, each about four times longer than the finished hanger.
2. Attach the cords.
Fold each piece in half and attach it to the ring using lark’s head knots. Once attached, you’ll have eight hanging strands.
3. Create the upper section.
Separate the strands into groups of two. About 6 inches below the ring, tie one square knot with each group. Try to keep the knots at the same height so the hanger stays balanced.
4. Build the plant cradle.
A few inches below the first row, connect neighboring groups by tying another row of square knots. This creates the net that will support your flower pot.
5. Secure the bottom.
Place the pot inside the net to check the fit. Then gather all of the strands beneath the pot and tie one large knot to hold everything securely in place.
6. Trim and hang.
Trim the remaining cord ends evenly or leave them slightly longer for a decorative tassel. Hang your plant hanger from a sturdy ceiling hook and place your pot inside.
Beginner Tips
- Test the fit with your pot before tying the final knot.
- Lightweight pots are easier for beginners and place less strain on the cord.
Common Mistakes to Avoid
- Uneven spacing between knot rows can cause the pot to tilt.
- Avoid using heavy ceramic pots until you’re comfortable with the technique.
Pro Tip
Faux plants are a great choice if you’re hanging the planter in a spot that’s difficult to water.

Macramé Keychains
Macramé keychains are one of the quickest projects you can make and are perfect for practicing basic knots. They also make thoughtful handmade gifts, stocking stuffers, or bag charms that use very little cord.
Difficulty: Beginner
Time: 20–30 minutes
Materials
- 1–2 mm single-strand cotton cord
- Key ring
- Sharp scissors
- Measuring tape
- Optional: wooden beads or charms
Step-by-Step
1. Cut the cord.
Cut three to five pieces of cord about 12 to 18 inches long, depending on how long you want the finished keychain to be.
2. Attach the cords.
Fold each cord in half and secure it to the key ring using a lark’s head knot. Slide the knots together so they sit neatly across the ring.
3. Tie your design.
Working from the key ring downward, tie a series of square knots or spiral knots until you’ve reached your desired length. Keeping the knots evenly spaced will give the finished keychain a polished look.
4. Personalize it.
If you’d like, thread a wooden bead or decorative charm onto the center cords before continuing your knot pattern.
5. Finish the ends.
Trim the loose cords evenly, or brush the ends with a fine-tooth comb to create a soft tassel.
Beginner Tips
- Pull each knot firmly, but try to keep the tension consistent from beginning to end.
- Shorter keychains are often easier to control while you’re learning.
Common Mistakes to Avoid
- Don’t leave large gaps between knots unless that’s part of your design.
- Avoid making the keychain too long, or it may catch on pockets and bags.
Pro Tip
Make several keychains in different colors while you’re practicing. They’re quick to finish and make great handmade gifts throughout the year.

Macramé Wall Pocket Planter
A wall pocket planter combines texture and greenery while taking up very little space. Instead of sitting on a shelf, your favorite small plant becomes part of the wall décor.
Difficulty: Confident Beginner
Time: 1–2 hours
Materials
- 2–3 mm single-strand cotton cord
- Small wooden dowel or natural branch (8–12 inches)
- Sharp scissors
- Measuring tape
- Lightweight faux plant or small nursery pot
Step-by-Step
1. Cut the cord.
Cut six to eight equal lengths of cord, making each piece about twice the finished length of your wall hanging.
2. Attach the cords.
Fold each cord in half and attach it to the dowel using lark’s head knots. Arrange the cords so they’re evenly spaced.
3. Create the decorative upper section.
Tie several rows of square knots to create the top portion of the wall hanging. This provides structure and serves as the decorative focal point.
4. Form the pocket.
Continue tying alternating square knots while leaving enough space between the rows to create a shallow pocket. Test the fit by placing your pot inside as you work. The pocket should cradle the pot securely without allowing it to slip through.
5. Finish the hanging.
Once you’re happy with the pocket depth, trim the remaining cords into a straight edge, soft point, or decorative fringe.
6. Add your plant.
Hang the finished piece on a wall hook and place a lightweight pot or faux plant into the pocket.
Beginner Tips
- Faux plants are lighter and make it easier to test your first project.
- Check the fit often while knotting instead of waiting until the end.
Common Mistakes to Avoid
- A pocket that’s too loose won’t support the pot properly.
- Heavy ceramic pots can stretch the cord and pull the hanging out of shape.
Pro Tip
Small trailing plants, like faux string of pearls or pothos, create a beautiful cascading effect that highlights the texture of the macramé.

Macramé Curtain Tiebacks
A pair of handmade curtain tiebacks is an easy way to add texture and softness to your windows. They’re quick to make, require only a small amount of cord, and can be customized to match almost any decorating style.
Difficulty: Beginner
Time: 30–45 minutes
Materials
- 3–4 mm single-strand cotton cord
- Sharp scissors
- Measuring tape
- Optional: wooden beads
- Wall hook or decorative knob
Step-by-Step
1. Measure and cut the cord.
Wrap a measuring tape around your curtain to estimate the finished length. Cut four cords about three times that measurement to allow room for knotting.
2. Create the hanging loop.
Fold the cords in half and tie a secure loop at one end. This loop will fit over the wall hook or decorative knob that holds the tieback in place.
3. Tie the decorative section.
Use square knots or spiral knots to create a decorative band through the center of the tieback. Continue knotting until you’ve reached the length needed to wrap comfortably around your curtain.
4. Finish the opposite end.
Tie all of the cords together with a neat overhand knot or wrapped gathering knot. Leave a short tassel below the knot or trim the ends evenly for a cleaner look.
5. Hang your tieback.
Wrap it around the curtain and secure the loop over your wall hook or knob.
Beginner Tips
- Test the fit around your curtain before trimming the ends.
- Matching the pair is easier if you complete one step on both tiebacks before moving to the next.
Common Mistakes to Avoid
- Making the tieback too short can make it difficult to wrap around thicker curtains.
- Uneven knot tension can cause the tieback to twist.
Pro Tip
Adding one or two wooden beads near the tassel creates a simple decorative accent without overwhelming the design.
Macramé Coasters
Macramé coasters are a quick weekend project that adds handmade texture to coffee tables, nightstands, and dining spaces. They’re also a wonderful way to use leftover cord from larger macramé projects.
Difficulty: Beginner
Time: 30–45 minutes
Materials
- 2–3 mm single-strand cotton cord
- Sharp scissors
- Measuring tape
- Fine-tooth comb or pet slicker brush (optional)
Step-by-Step
1. Cut your cord.
Cut several equal lengths of cord according to the size of the coaster you’d like to make.
2. Create the center.
Bundle the cords together and secure them with a tight gathering knot, leaving the ends hanging evenly on both sides.
3. Tie the coaster.
Working outward from the center, use rows of square knots to create a flat rectangular or square shape. Continue adding rows until the coaster reaches the size you want.
4. Shape the edges.
Trim the loose ends evenly or brush them into soft fringe for a more decorative finish.
5. Flatten the coaster.
Lay the coaster on a flat surface and gently shape it with your hands. If needed, lightly mist it with water and allow it to dry flat to help it hold its shape.
Beginner Tips
- Keep your knot spacing as even as possible for a flatter coaster.
- Make a second coaster immediately after the first while the process is still fresh in your mind.
Common Mistakes to Avoid
- Pulling some knots much tighter than others can cause the coaster to curl.
- Avoid making the coaster too small. It should comfortably support a mug or glass.
Pro Tip
Create a matching set in neutral colors for everyday use, or experiment with seasonal colors to decorate your table throughout the year.
7. Hanging Candle Holders
Add a cozy, handmade glow to your space with macramé hanging candle holders. They’re perfect for holding small glass jars or battery-powered candles while bringing soft texture to your décor.
Materials:
- Cotton cord (3–4 mm)
- Small glass jars or candle holders (lightweight)
- Metal or wooden ring
- Scissors
- Tape measure
- Ceiling or wall hook
Step-by-Step:
- Cut your cords
- Cut 4–6 cords, each about three to four times the length you want your hanger to drop.
- Attach cords to the ring
- Fold the cords in half and pull the loose ends through the ring to secure with a lark’s head knot.
- Create the cradle for the candle holder
- Divide the cords into pairs. A few inches below the ring, tie a square knot in each pair.
- Then, a few inches lower, tie another row of knots by joining cords from neighboring pairs. This will create a secure net pattern.
- Add your jar or candle holder
- Place your jar or glass container inside the cradle, making sure it sits evenly.
- Secure the bottom
- Gather all cords beneath the jar and tie a tight knot to hold it firmly in place. Trim the ends neatly or leave a short fringe.
- Hang and style
- Hang your holder from a ceiling or wall hook. Add a tea light or LED candle for a soft, warm glow.
Pro Tips:
Try grouping three holders at different lengths for a cozy, layered effe
Always use battery-powered candles for safety.
Adjust knot spacing to fit your jar snugly.

8. Macramé Wall Organizer (Mail + Keys Pocket)
A tidy, textured way to corral mail, sunglasses, keys, and small everyday items. This wall organizer builds small pockets into a simple macramé panel so everything has a place — stylish and practical.
Materials:
- Cotton cord (3–4 mm)
- Small wooden dowel (12–18 inches)
- Scissors
- Tape measure
- Optional: a few small wooden beads or a metal key ring to hang keys from inside a pocket
Step-by-Step:
- Cut your cords
- Cut 8 cords, each about twice the finished height you want the organizer to be (for example, for a 20″ finished height, cut cords ~40″ long).
- Keep pairs together — you’ll be working with pairs to form pockets.
- Attach cords to the dowel
- Fold each cord in half and attach to the dowel using a lark’s head knot (folded loop under the dowel, pull loose ends through the loop).
- Space the lark’s head knots evenly along the dowel so you have 8 evenly spaced vertical cords (16 working strands).
- Form the pocket tops (row 1)
- Decide how many pockets you want (2–3 medium pockets work well across a 12–18″ dowel).
- Working from left to right, take four adjacent working strands (two cords = four strands) and tie a row of square knots about 2–3 inches down from the dowel. This row forms the top edge of the pocket.
- Repeat across the dowel so you have 2–3 top rows that will become pocket openings.
- Create the pocket body (row 2)
- Measure 2–4 inches below the first row (depending on how deep you want the pocket).
- Use alternating square knots to connect adjacent groups: with the outer two strands of one pocket and the inner two strands of the neighboring pocket, tie square knots that draw the groups together. This creates a net-like pocket that holds mail or small items.
- For a single deeper pocket across the width, continue tying more rows of alternating square knots until you reach desired depth.
- Reinforce pocket bottom
- When the pocket is the depth you want, tie a firm gathering knot across the bottom of the pocket section (gather all pocket strands and tie a tight overhand or wrapped knot beneath the pocket). This prevents items from slipping through.
- Leave open sections for keys
- For a keys spot, leave one narrow vertical section without deep pocketing (no bottom gathering knot). Instead, add a small metal key ring by tying it onto a single folded cord using a lark’s head knot or slide a wooden bead onto two strands and knot below it — this gives keys a dedicated hang point inside the organizer.
- Finish the lower edge
- Below your pockets, trim the remaining cord ends neatly (straight or slightly angled) or leave them with a short fringe for texture. If you want a cleaner look, tuck and glue ends under the last knot (optional).
- Hang the organizer
- Hang the dowel on a wall hook at eye level near your entryway. Test with lightweight items first (envelopes, sunglasses, keys) to ensure pockets hold properly.
Pro Tips:
Avoid heavy items — this organizer is for lightweight daily carry, not heavy books. lightweight décor.
Keep pocket depth relative to common items: 3–4″ is great for mail; 4–6″ if you want room for sunglasses or small notebooks.
Tight, even knots = more secure pockets. If a pocket feels loose, add another row of square knots.
Use a wooden bead or a small metal ring inside one pocket so keys don’t get buried.

9. Mini Boho Wall Tassels
Tiny macramé tassels are a simple way to add handmade charm to walls, mirrors, or gift wraps. They’re quick to make and bring soft texture to any space.
Materials:
- Cotton cord (2–3 mm)
- Scissors
Step-by-Step:
- Cut your cord
- Cut a piece of cord twice as long as you want your finished tassel to be.
- Fold and tie
- Fold the cord in half.
- Tie a small knot near the folded end to create a loop for hanging.
- Wrap the top
- Cut a short extra piece of cord. Wrap it tightly around the top of the tassel, just below the knot, and tie it in the back to secure.
- Trim and shape
- Trim the ends evenly for a polished look or leave them uneven for a more casual, boho feel.
- Display your tassels
- Hang them individually from hooks, in clusters, or string several together to make a garland.
Pro Tips:
Add small beads above the wrap for extra detail.
Mix tassel lengths and colors for a layered, textured display.

10. Macramé Hanging Shelf
Add a stylish, space-saving touch to your room with a handmade macramé hanging shelf. Perfect for plants, books, or decorative items, this project is both functional and visually striking.
Materials:
- Cotton cord (3–4 mm)
- Small wooden shelf board (6–12 inches wide)
- Scissors
- Tape measure
- Ceiling or wall hook
Step-by-Step:
- Cut cords
- Cut 4 cords, each about 3–4 times the length you want the shelf to hang.
- Attach cords to the shelf
- Tie one cord to each corner of the wooden board using a secure lark’s head knot or square knot. Make sure the knots are tight and cords hang evenly.
- Create decorative knots along the cords
- Use square knots, spiral knots, or alternating patterns along each cord for strength and style. Keep knots consistent so the shelf hangs evenly.
- Secure the top
- Gather all four cords together above the shelf and tie a strong knot at the top. This will be the point where the shelf hangs from a hook.
- Hang your shelf
- Attach the top knot to a ceiling or wall hook. Place lightweight plants, books, or décor on your shelf.
Pro Tips:
- Test the shelf with light items first to ensure knots are tight and cords are even.
- Mix knot patterns or add small beads for extra visual interest.
- Adjust cord length proportionally to your wall or ceiling space.
These macramé projects add handmade charm, style, and function to small spaces. They’re beginner-friendly, creative, and perfect for gifting.