
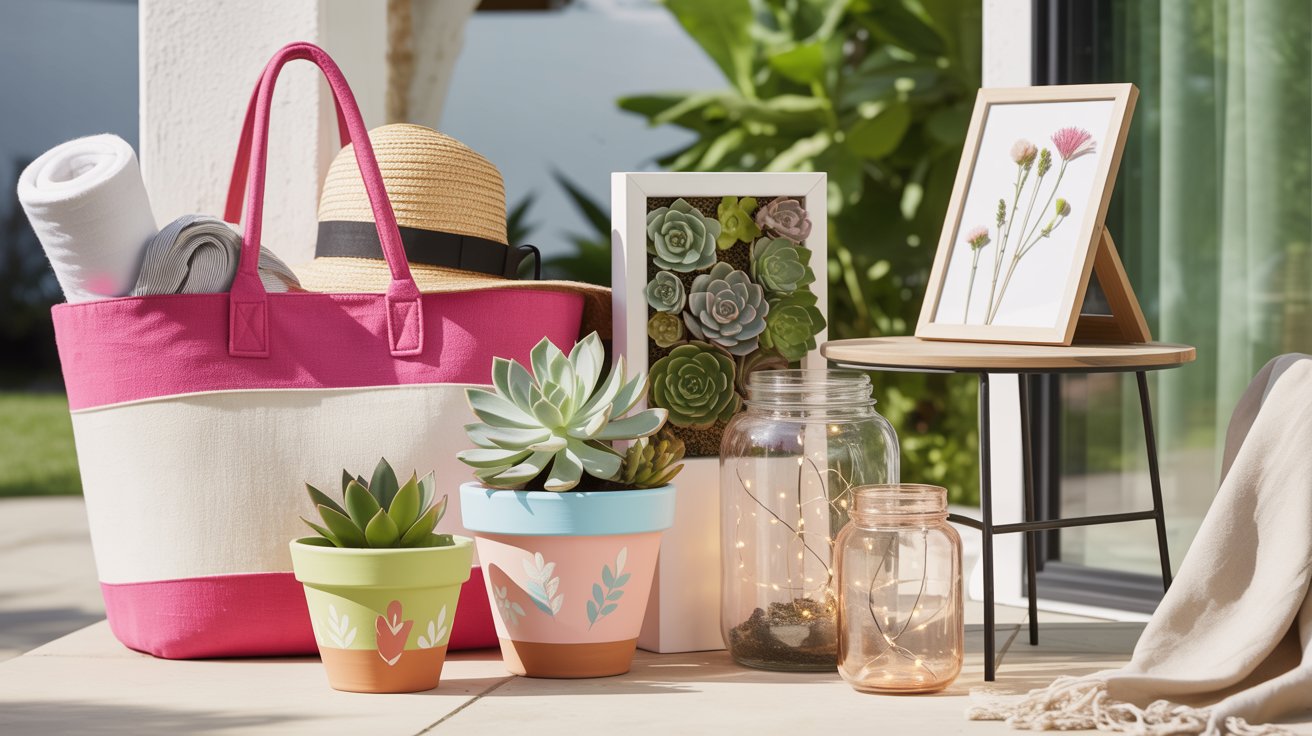
If you’re in the mood to make something cheerful for your home, spring and summer are the perfect excuse to start a few simple DIY projects. A colorful planter, a handmade candle, or a small decorative detail can brighten a space without a full renovation or weekend-long project.
The projects in this collection are beginner to moderate and designed to be flexible enough to make your own. They’re creative but approachable and meant for real-life spaces—windowsills, patios, porches, and tabletops. Pick one that catches your eye or try a few over the season, and you’ll end up with small handmade touches that make your home feel a little brighter and more personal.

1. Painted Terra Cotta Planters
Plain terra cotta pots are a perfect blank canvas for spring and summer creativity. With just a little paint and imagination, they can become cheerful planters that brighten windowsills, shelves, or outdoor spaces. This project is simple enough for beginners but flexible enough to experiment with patterns, colors, and finishes.
What You’ll Need:
- Terra cotta pots
- Acrylic or outdoor paint
- Paintbrushes or foam brushes
- Painter’s tape or stencils
- Paper towels or drop cloth
- Optional: metallic paint pens or clear sealant
Step-by-Step Instructions:
- Prep the pots:
Wipe the pots clean and let them dry completely. Terra cotta can be dusty, so starting with a clean surface helps the paint adhere better. - Apply a base coat:
Paint the outside of the pot with a solid base color. Light shades may need two thin coats. Let the first coat dry fully before adding another. - Add your design:
Use painter’s tape or stencils to create stripes, arches, or geometric patterns. You can also freehand simple florals, dots, or abstract shapes. - Let it dry:
Allow the design to dry completely before handling. If you plan to use the pot outdoors, apply a clear sealant to protect the paint. - Style and plant:
Add soil and your favorite plant, or leave the pot empty as a decorative piece until planting time.
Do’s & Don’ts:
✅ Do use thin paint layers for a smooth finish.
❌ Don’t paint the inside of the pot where soil and water will sit unless you plan to seal it thoroughly.
Pro Tips:
- Stick to two or three colors for a cleaner, more polished look.
- Try painting just the rim or bottom half for a modern, dipped effect.
- Metallic accents work beautifully for adding a subtle, elevated touch.
- Group several painted pots together in slightly different patterns for a cohesive display that still feels playful.

2. Mason Jar Lanterns With Lights
Mason jars make wonderfully simple lanterns for spring and summer evenings. With a few small touches, they turn into glowing accents for patios, porches, or even indoor shelves. These lanterns feel casual and charming, and they’re easy to customize for different moods—from rustic to softly elegant.
What You’ll Need:
- Mason jars
- Battery-operated string lights
- Twine, ribbon, or wire for handles
- Optional: sand, pebbles, or faux flowers
- Scissors
Step-by-Step Instructions:
- Prep the jars:
Wash and dry the jars thoroughly to remove dust or residue. - Add the lights:
Place the string lights inside the jar, leaving the battery pack accessible at the top or tucked behind the jar. - Create a handle:
Wrap twine or wire around the rim of the jar and twist securely to form a hanging loop. - Add decorative touches:
If desired, layer sand or small pebbles in the bottom for weight, or tie ribbon or small faux flowers around the neck of the jar. - Display your lanterns:
Set them on tables, line them along steps, or hang them from hooks or branches for a soft, glowing effect.
Do’s & Don’ts:
✅ Do use battery-powered lights for safety and portability.
❌ Don’t place real candles in sealed jars without ventilation.
Pro Tips:
- Group jars in different sizes together for a more dynamic display.
- Use warm white lights for a cozy glow or soft colored lights for a playful look.
- Line several lanterns along a walkway or porch railing to create a welcoming evening atmosphere.

3. Pressed Flower Wall Art
Pressed flowers are a beautiful way to preserve the feeling of spring and summer long after the blooms fade. Framed simply, they become delicate wall art that feels light, natural, and personal. This project is slow and calming, making it as enjoyable to create as it is to display.
What You’ll Need:
- Fresh flowers or greenery
- Heavy book or flower press
- Parchment or wax paper
- Frames or floating glass frames
- Tweezers (optional)
Step-by-Step Instructions:
- Select your flowers:
Choose flat blooms or leaves that will press easily, such as daisies, pansies, ferns, or small wildflowers. - Press the flowers:
Place flowers between parchment or wax paper and tuck them inside a heavy book or flower press. Leave them for 1–2 weeks until fully dry. - Arrange your design:
Once dry, carefully arrange the flowers on a piece of paper or directly inside the frame. Use tweezers for precise placement if needed. - Frame your art:
Secure the flowers between the glass and backing. Floating frames work especially well for a clean, airy look. - Hang or display:
Arrange several frames together as a small gallery wall or lean them on a shelf for a softer effect.
Do’s & Don’ts:
✅ Do press flowers when they are dry and free of moisture.
❌ Don’t rush the pressing process; fully dried flowers hold their color better.
Pro Tips:
- Mix flowers and greenery for more texture and visual interest.
- Keep the designs simple—negative space makes the flowers stand out.
- Label the back of each frame with the date or location the flowers were picked for a personal touch.
- Display out of direct sunlight to prevent fading over time.

4. Butterfly Window Suncatchers
Butterfly suncatchers add a playful, light-filled touch to windows and glass doors. When the sun shines through, they cast soft color and gentle shapes across the room, making them especially cheerful for spring and summer.
What You’ll Need:
- Transparent plastic sheets or acetate
- Permanent markers or glass paint
- Scissors
- Butterfly stencil or template (optional)
- Suction cups or clear fishing line for hanging
Step-by-Step Instructions:
- Create your butterfly shapes:
Draw or trace butterfly outlines onto the plastic sheets. Keep the shapes fairly simple so they’re easy to cut and color. - Color the design:
Use permanent markers or glass paint to fill in the wings with bright or pastel shades. Let the colors dry completely before cutting. - Cut out the butterflies:
Carefully trim around the edges of each butterfly shape. - Attach for hanging:
Add a small hole at the top or tape fishing line to the back. Use suction cups to hang them directly on windows. - Arrange and display:
Space the butterflies apart so light can pass through each one clearly.
Do’s & Don’ts:
✅ Do use vibrant colors so the sunlight shows through clearly.
❌ Don’t hang them where they’ll be bumped or smudged often.
Pro Tips:
- Mix large and small butterflies for a layered look.
- Slightly bend the wings forward for a subtle 3D effect.
- Cluster several butterflies in one window for a brighter visual impact.

5. Coffee Filter Flower Bouquets
Coffee filter flowers are soft, lightweight, and surprisingly beautiful once colored. They make easy tabletop arrangements that last all season and can be refreshed anytime with new colors.
What You’ll Need:
- White coffee filters (or colored tissue paper)
- Water-based markers or watercolor paint
- Spray bottle with water
- Floral wire or pipe cleaners
- Scissors
- Small vase or jar
Step-by-Step Instructions:
- Color the filters:
Lay the coffee filters flat and color them with markers or paint. Lightly mist with water so the colors blend and soften. Let dry completely. You can also use colored tissue paper instead of coffee filters for a slightly different look. - Layer the petals:
Stack three to five filters together for each flower. - Shape the bloom:
Pinch the center of the stacked filters and gently scrunch outward to form petals. - Add the stem:
Insert floral wire or a pipe cleaner through the center and twist to secure. - Arrange your bouquet:
Place several flowers together in a vase or jar and adjust the petals for fullness.
Do’s & Don’ts:
✅ Do mix light and dark colors for depth.
❌ Don’t oversaturate with water or the paper may tear.
Pro Tips:
- Trim the edges into scallops or points to mimic different flower shapes.
- Combine coffee filter flowers with real greenery for a more natural look.
- Make several in coordinating colors for a cohesive centerpiece or shelf display.
- Add a small paper or bead pistil in the center for a realistic touch — roll a tiny piece of yellow paper or use a small cluster of beads and attach carefully with a tiny dab of super glue or tacky craft glue.
- For extra realism, cut additional coffee filter or tissue paper pieces into petal shapes and gently tuck or glue them around the center pistils, layering them inside the flower to create a fuller, more natural bloom.

6. Fabric-Covered Spring Vases
Plain glass or ceramic vases can be transformed with fabric for a soft, seasonal look. This project is a great way to use up fabric scraps and create pieces that feel fresh without buying new décor. The fabric adds texture and pattern while still keeping the vase simple and functional.
What You’ll Need:
- Plain glass or ceramic vases
- Fabric scraps (cotton or linen work best)
- Fabric glue or Mod Podge
- Scissors
- Optional: ribbon or twine for trim
Step-by-Step Instructions:
- Prepare the vase:
Clean and dry the surface so the fabric adheres properly. - Measure and cut fabric:
Cut fabric pieces large enough to wrap around the vase with a small overlap. - Apply adhesive:
Brush a thin layer of glue onto the vase and smooth the fabric onto the surface, working out wrinkles as you go. - Finish the edges:
Fold excess fabric neatly along the top and bottom edges and secure with glue. - Let dry and style:
Allow the vase to dry fully before adding flowers or greenery.
Do’s & Don’ts:
✅ Do use lightweight fabric so it lays flat.
❌ Don’t oversaturate with glue, which can soak through and leave marks.
Pro Tips:
- Stick to simple patterns or soft florals for a clean, seasonal look.
- Try wrapping only the bottom half of the vase for a dipped effect.
- Make a small set of matching vases in coordinating fabrics for a cohesive display.

7. Oversized Beach Bag Tote
A large, colorful tote is perfect for carrying towels, snacks, and sunscreen for outdoor adventures. DIY allows you to choose bright, cheerful colors that bring summer energy.
What You’ll Need:
- Sturdy canvas or duck cloth fabric (1–2 yards)
- Coordinating thread
- Scissors, fabric chalk, measuring tape
- Sewing machine or hand sewing supplies
- Optional: fabric paint, stencils, or iron-on patches
Step-by-Step:
- Cut two rectangles for the bag body and two strips for the handles.
- Fold and sew the handle strips, turn right side out, and press.
- Sew the body rectangles right sides together, creating a boxed bottom if desired.
- Attach handles securely using a square or X stitch.
- Decorate with paint, stencils, or patches for a seasonal pop.
- Finish the top edge with a folded and sewn hem.
💡 Pro Tip: Contrasting handles or a colorful lining makes the tote playful and summery.

8. DIY Floral Garland With Lights
Combining flowers and string lights creates a glowing garland that works beautifully for patios, mantels, or bedroom walls. It’s soft, romantic, and flexible enough to fit many decorating styles—from cottage to modern.
What You’ll Need:
- Faux or real flowers
- Battery-operated string lights
- Floral wire or clear tape
- Scissors
Step-by-Step Instructions:
- Prepare the flowers:
Trim stems so each bloom sits close to the garland without excess bulk. - Lay out the lights:
Stretch the string lights out on a flat surface so you can space the flowers evenly. - Attach the flowers:
Use floral wire or clear tape to secure each flower along the light strand, placing blooms every few inches. - Shape the garland:
Gently curve the strand into a natural drape rather than a straight line. - Hang and light:
Drape over a shelf, headboard, or railing and turn on the lights for a soft glow.
Do’s & Don’ts:
✅ Do mix different flower sizes and greenery for depth.
❌ Don’t cover the light bulbs completely with petals.
Pro Tips:
- Use warm white lights for a cozy look or soft pastel lights for a playful feel.
- Add a few leaves or vines between blooms so the garland looks fuller.
- Store the garland loosely coiled to prevent bending or tangling.

9. Succulent Shadow Box Display
A succulent shadow box is a beautiful way to bring greenery indoors without taking up table space. It works as wall art or as a shelf accent and can be made with faux or real succulents depending on how much maintenance you want.
What You’ll Need:
- Shallow shadow box frame or tray-style frame
- Faux succulents or small real succulents
- Moss, soil, or decorative pebbles
- Hot glue (for faux succulents) or adhesive dots
- Optional: small stones, driftwood, or decorative sand
Step-by-Step Instructions:
- Prepare the frame:
Remove the backing if needed and lay the frame flat so you can build your design inside. - Create the base:
Add a thin layer of moss, soil, or pebbles to cover the bottom of the frame. - Arrange the succulents:
Play with placement before securing them. Mix sizes and shapes so the arrangement feels natural. - Secure the plants:
Glue faux succulents in place or gently press real succulents into soil so they stand upright. - Finish and display:
Add small stones or driftwood for texture, then hang the frame or prop it on a shelf.
Do’s & Don’ts:
✅ Do leave space between plants so each one stands out.
❌ Don’t seal real succulents in an airtight frame—they need airflow.
Pro Tips:
- Faux succulents are ideal for low-light rooms or low maintenance.
- If using real plants, choose varieties that stay small and need minimal watering.
- Rotate real succulent frames occasionally so all plants receive light.
- Keep the color palette soft and cohesive for a more polished look.

10. Custom Painted Welcome Mats
A painted welcome mat is a simple way to make your entryway feel cheerful and personal for spring and summer. This project adds personality right at the front door and is easy to refresh whenever you want to change the look for a new season.
What You’ll Need:
- Plain coir or rubber welcome mat
- Painter’s tape or stencils
- Outdoor acrylic paint
- Paintbrushes or foam brushes
- Optional: clear sealer spray for durability
Step-by-Step Instructions:
- Prep the mat:
Shake out any loose fibers and wipe the surface clean so the paint adheres evenly. - Plan your design:
Use stencils, painter’s tape, or freehand lettering to map out your pattern. Simple words, florals, or geometric shapes work especially well. - Paint the base:
Apply a thin coat of paint and let it dry completely. Add a second coat if needed for better coverage. - Add details:
Layer in additional colors or accents once the base is dry, keeping the design easy to read from a distance. - Seal the mat:
Spray with a clear outdoor sealer to help protect the paint from moisture and wear.
Do’s & Don’ts:
✅ Do let each paint layer dry fully before adding the next.
❌ Don’t overload the mat with too many colors or tiny details—they won’t show up well once placed outside.
Pro Tips:
- Stick to high-contrast colors so your design stands out.
- Seasonal motifs like flowers, leaves, or sun shapes keep the look fresh and inviting.
- Pair your mat with potted plants or lanterns to create a coordinated entryway scene.
- If you like to change décor often, use stencils so you can repaint the mat for different seasons.
Conclusion
Spring and summer are perfect seasons for small creative projects that make everyday spaces feel lighter and more joyful. From painted planters to glowing garlands and personalized entryways, each of these DIY ideas offers a simple way to bring color, texture, and personality into your home.
You don’t need to tackle every project at once. Choose one that fits your mood or your space, and let it be a starting point for welcoming the warmer days ahead. With a little time and creativity, these handmade touches can help your home feel bright, cheerful, and ready for the season.