
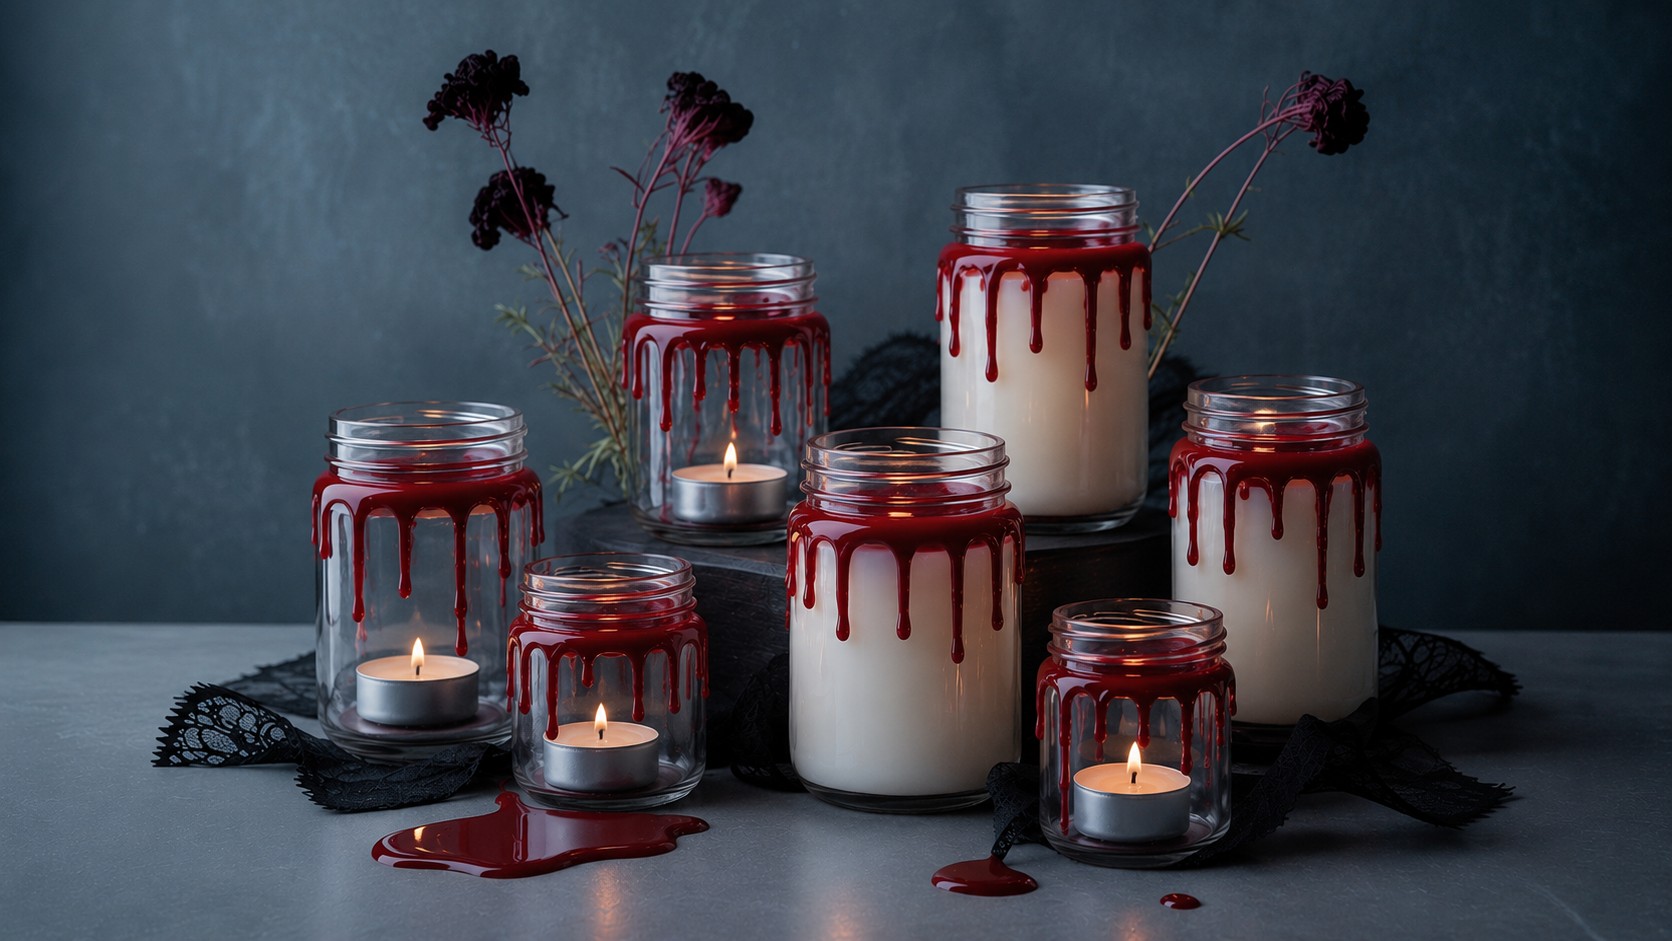
Some Halloween décor leans spooky, while some leans elegant. If you are searching for unique Halloween candle ideas that strike a beautiful balance between the two, these Vampire Drip Candle Jars are the answer. Rich crimson candle wax drips over creamy white candles or clear glass jars, creating a dramatic gothic Halloween candle DIY that feels more old-world manor than haunted house. Best of all, this is one of the easiest DIY Halloween candles you can make, and it can be styled two ways: with ready-made white jar candles for a boutique look, or with simple glass jars and tea lights for a lantern-style version.
Materials for These DIY Halloween Candles
For the classic vampire candle:
- White jar candles
- Red taper candle
- Lighter or matches
For the vampire lantern:
- Clear glass jars
- Tea lights or battery-operated LED tea lights
- Red taper candle
- Lighter or matches
For both versions:
- Parchment paper or newspaper to protect your work surface
- Optional: vintage books, dark florals, black ribbon, lace, or other gothic décor for styling
Time: About 15–20 minutes, plus cooling time
Skill level: Beginner
Best for: Halloween decorating, gothic-inspired displays, shelves, mantels, and Halloween centerpieces

Instructions
1. Prepare Your Workspace
Cover your work surface with parchment paper or newspaper.
Arrange your candles or jars where they can remain undisturbed while the wax cools.
2. Melt the Red Candle Wax
Light the red taper candle and let it burn for a few minutes until a small amount of melted wax collects around the wick.
Carefully hold the taper candle over the rim of your jar or candle, keeping the flame and hot wax away from your hands and work surface.
3. Create the Vampire Drips
To create the DIY bleeding candles effect, tilt the red taper slightly and allow a small amount of melted red candle wax to fall onto the rim of the white candle or glass jar.
Work slowly, adding one drip at a time. Let the wax run naturally over the edge rather than trying to make every drip the same length.
Rotate the candle or jar as you work, leaving some areas with short drips and allowing a few to run farther down the sides. The uneven lengths are what give the finished piece its realistic, old-fashioned look.
4. Build Up the Wax
Once the first layer of wax has cooled for a minute or two, add another small amount of red candle wax to a few areas around the rim.
Build up slightly more wax near the top edge while leaving other sections lighter. This creates the look of thick candle wax that has slowly melted and hardened over time.
Avoid covering the entire rim. Leaving some of the original candle or glass visible keeps the finished design elegant rather than overly heavy.
5. Choose Your Display Style
Option 1: Classic Vampire Candle
Use white jar candles as your base and add the red wax directly around the candle’s rim.
Once the decorative wax has hardened completely, your vampire candles are ready to display. When lit, the creamy white candle and dramatic crimson drips create the look of an antique gothic candle.
Option 2: Vampire Lantern
For a different take on the vampire candle look, use empty clear glass jars as your base.
Add the red wax drips around the outside rim of each jar. Once the wax has hardened, place a tea light or battery-operated LED candle inside.
The light shines through the clear glass and illuminates the red drips, creating a softer lantern-style glow. This version works especially well on shelves, mantels, entry tables, and Halloween tablescapes.
6. Display
Group several candles or lanterns together for the most dramatic effect.
Allow all decorative wax to cool completely before moving your finished pieces.
How to Make Drip Candles for Halloween Look Realistic
The secret to getting that dramatic vampire-drip effect is to avoid making every drip look perfect. Let some drips be short and others longer, and build up a little extra wax in a few spots around the rim.
For an especially dramatic Halloween display, make several candles or lanterns with slightly different amounts of red wax. The variation will make the collection look more natural and give your display more visual interest.

Styling Tips
- Arrange candles or lanterns in varying heights for a layered display.
- Stack a few on vintage books for an old-world look.
- Pair them with dark florals, black candlesticks, or antique-inspired décor.
- Display them on a mantel, dining table, bookshelf, or Halloween centerpiece.
- Use a dark backdrop to make the crimson drips stand out.
- Mix both versions together for added visual interest.
Safety Note
Never leave burning candles unattended. Keep open flames away from curtains, paper, books, dried flowers, and other flammable materials, and keep candles out of reach of children and pets. Allow all decorative wax to cool and harden completely before moving or handling your finished pieces.
If you are using the lantern version, battery-operated LED tea lights are a great option for a lower-maintenance display.